SESSION INSIGHT
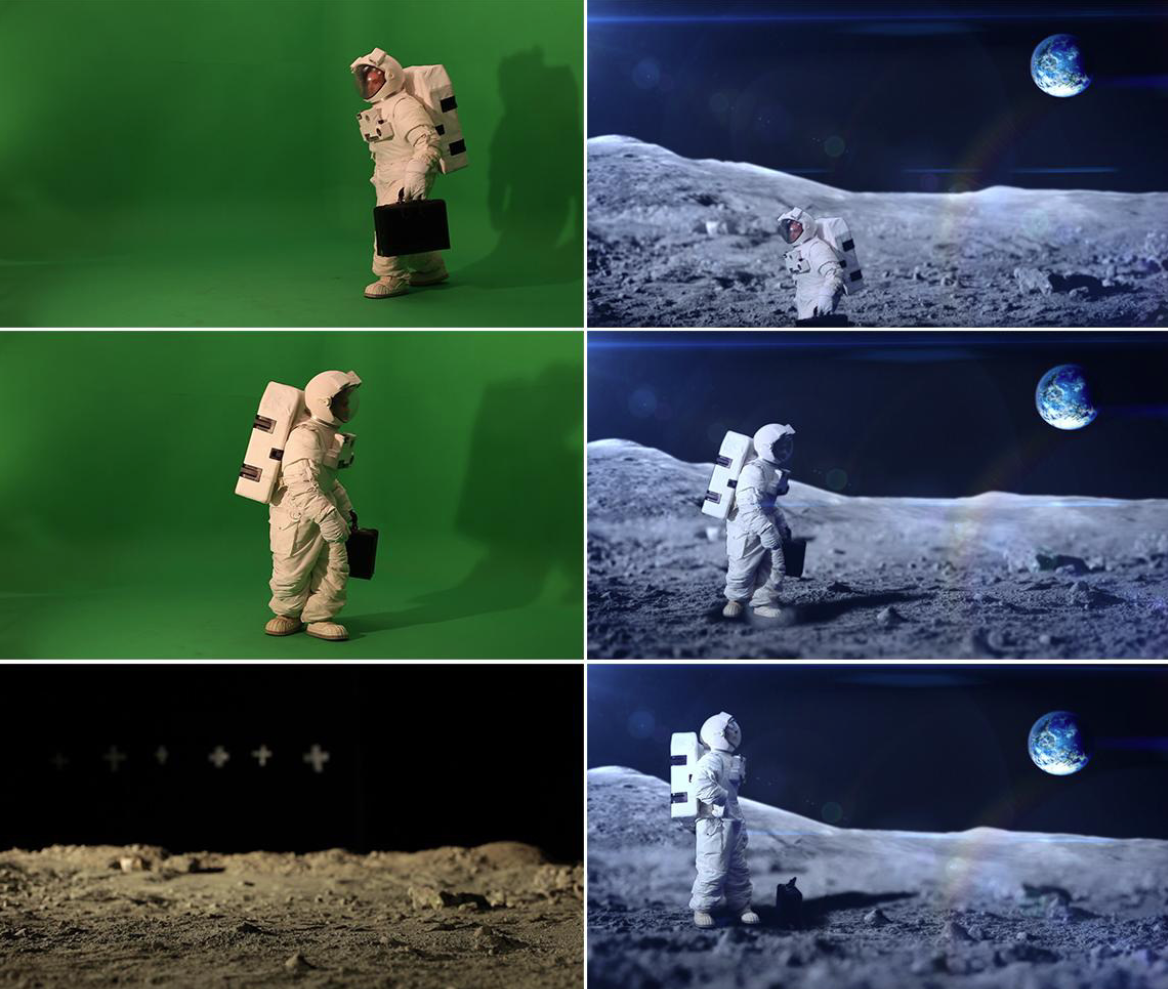 You might be wondering what “Chroma Key” means. The term is used to describe the technique of removing a certain range of color from an image or video to make part of it transparent. The image or video can then be used to composite (layer) other elements, backgrounds, etc. This technique is often used in industries like news casting, video games, and of course, visual effects in movies and television. It is also referred to as color keying, green screening, etc. but it all refers to the same technique. The images with the astronaut reveal a little bit of the process behind the scenes. The actor was filmed in front of a green screen in a studio, and an artificial set was created and filmed. The final result is the composite of the two shots with an additional plate of space background and some digital lighting/lens flares to give it an authentic feel. Hmm… since this technology has been around for so long, could it be possible that the first men on the moon were faking it?! Read more about this conspiracy here!
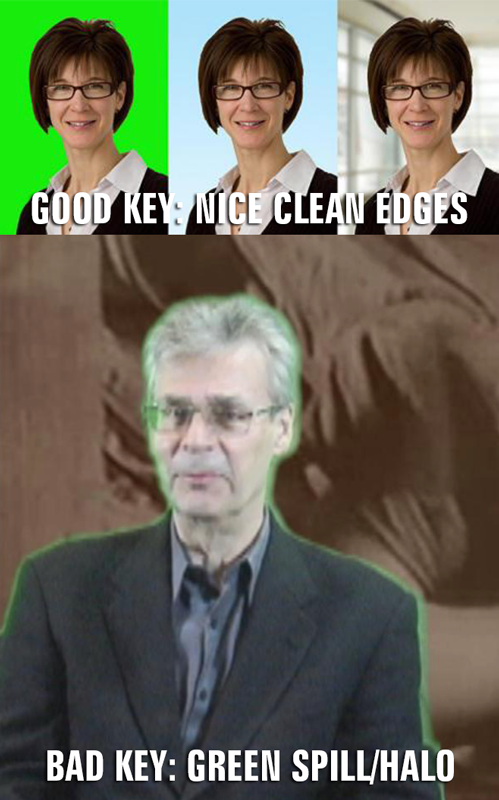 A key itself refers to the actual final “keyed” shot that now has transparency. Pulling a good “key” from your video means that there is little to no trace of the green or blue screen left in the image, and you have nice defined areas of transparency against your subject.A bad “key” means that the effect didn’t quite work all the way or may need more effort to make it better. Usually this technique is used to create realistic scenes: superman flying, Nucky Thompson in an 1920’s Atlantic City boardwalk, hobbits and dwarves in a fantasical land… So any evidence of this keying process will just make the final shot unbelievable and sloppy. There are lots of little secrets to accomplishing a good key, and most of them are in actual production. Be sure to check out the focus area on successful keys.
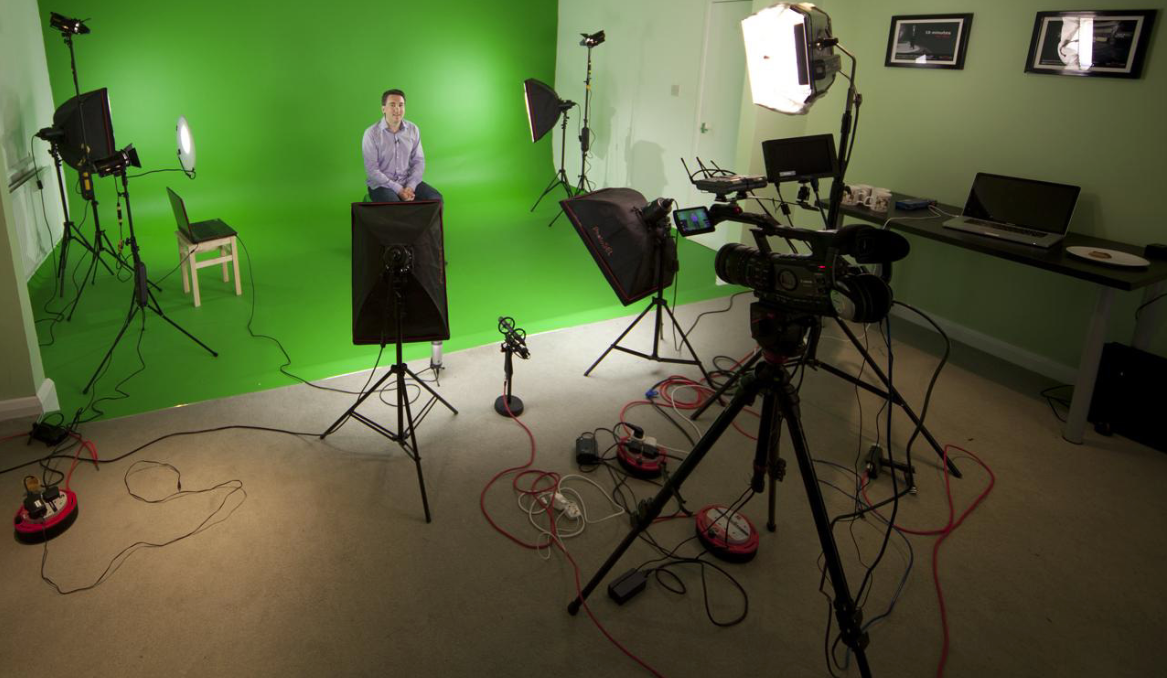
The quality of your key is almost always dependent on the quality of your green screen setup. Here is a look at a small-scale studio setup with a nice seamless corner, or cyc (short for cyclorama.)
Movies special FX use green screens a lot, we all know it. Sometimes, they use blue screens instead, and not just because the character is dressed in green. So…why ? Time to get it!
Ever wonder how visual effects were made before computers? It’s easy to forget that making a background transparent wasn’t always as easy as clicking a couple of buttons. How did we go from the very first moving pictures to the latest superhero movie? Watch this fascinating video below to learn about the processes that made modern VFX possible.
And a little more on this subject, from another perspective…
If you decide to light your own green screen for a project, there are a few things to keep in mind. First is to try and light your green screen as evenly as possible. Make sure to used diffused or bounced lighting – don’t ever point a light directly at a screen, as this will create hot spots. A simple piece of white foarm board can be used to reflect light towards your back drop. If there are bright spots from the light or shadows from the subject, it will create different shades of green which become increasingly harder to key out.
An evenly lit green screen should make a nice even green color that is easy for After Effects to key. Also, if you are using cloth or a sheet for the green, try and smooth it out as much as possible. Wrinkles create dark areas which will not show up as green in the computer and will therefore not get keyed. Try and think of your green screen and subject as two separate things that you need to light rather than lighting everything at once. Make sure your subject is at least 8-10 feet away from your screen. Light bounces off surfaces and takes about that distance to decay. Otherwise you will have green or blue light on the edges of clothing or hair, making a pretty miserable keying process in post production.
Please watch the video below for some other things to keep in mind.
Keying tutorial:
Lighting tutorial:
Use the link below to work with the files used in this session’s tutorials.
