SESSION INSIGHT
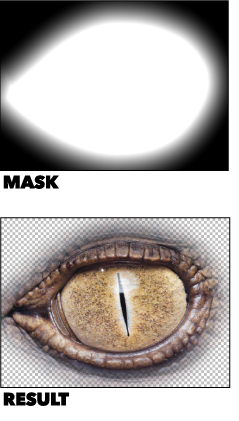 As digital artists, or anyone living in the 21st century, our world revolves around digital images and it is our job to understand how to effectively manipulate those images to suit our artistic vision.
One of the most common ways to manipulate images (photos, videos, text, etc.) is to hide or reveal parts of them to use them in different ways. The easiest and most common way to cut out part of an image (or anything with pixels) is to use a technique called “masking” where we create a shape (or multiple shapes) and everything inside or outside that shape is made transparent.
The thing to truly understand here is what’s happening in the background – what the computer and software are really up to in order to make this magic moment happen. The way digital imaging and video/gfx operates when dealing with masks is a very simple reference to black and white, and all the grays in between. Before applying a mask, the computer is just told to include all pixels of whatever image or video is active in a layer. As soon as it is instructed to process a mask, it looks for the black and white data. What is black is hidden 100%, and what it white is revealed 100%. Anything within the ranges of grays will display that percentage (50% gray=50% transparency.)
This is made fairly clear in Photoshop when looking at the layers panel, but not so evident in After Effects. But if you want to consider yourself a serious digital artist or animator, you must understand the nuts and bolts of how these tools work.
To see this technique in action, please watch the short video below which goes into detail about how to use masks in After Effects.
Now that we understand what a mask is, let’s talk about mattes.
A matte is basically an image (again, can be photo, text layers, video, animated graphics, anything with pixels) that we use to define areas of transparency on another layer instead of just a shape that we draw ourselves like with masks.
Every digital image is made up of 3 or 4 channels, the Red, Green, and Blue channels for color information, and if an image has transparency, it has a 4th channel called the Alpha channel to define that area. In compositing applications like After Effects, we can use either the Alpha channel or the brightness and darkness (luminance) of an image to define areas of visibility on another layer using what are called Track Mattes.
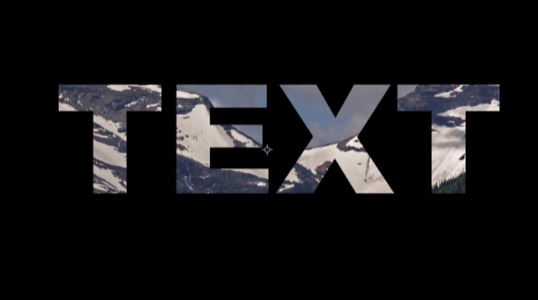
There are two types of track mattes, Alpha mattes and Luma mattes. Alpha mattes use the alpha (transparency) of an image to define visibility for the layer beneath it. The best analogy to think of is a stencil. The images below show how an Alpha matte works.
 Here there are two layers, a mountain image and a text layer. If we want the mountain to only appear inside the shape of the text, we would use an Alpha matte on the mountain image for it to appear inside or outside the Alpha (or wherever there are pixels) of the text layer.
Below you will see the results. The mountain becomes visible only through the “Alpha” of the text layer.
And here we have two images, a cabin, and an image of black ink on a white background. This is an example of the Luma matte, where the cabin layer becomes visible only through the “luminance” of the ink layer. The black parts of the ink layer reveal the cabin layer underneath it and the white parts completely hide it, while the grays partially reveal the cabin layer.
ORIGINAL IMAGE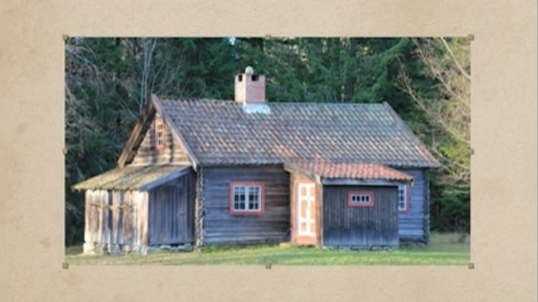
“INK” BLOT USED FOR LUMA MATTE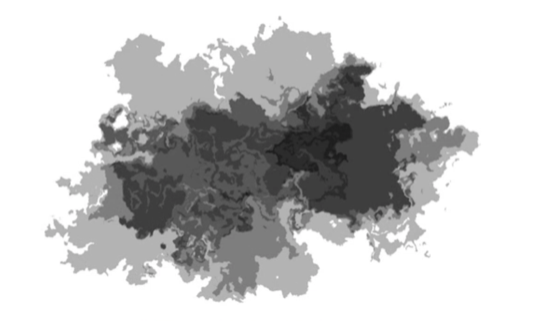 FINAL RESULT

In either case, color never matters. The software completely disregards those values and only looks at the grayscale values of the target source of the matte.
Once you understand track mattes, you’ll find incredible uses for them, such as this title sequence from the show True Detective. See if you can spot where they used track mattes to reveal images inside the shapes of other images.
Now, you might not know right away when to use masks or track mattes but the more experience you get, the more you’ll know when to use each one.
For now, try to remember that masks are part of the layer they are applied to so when you move that layer, the mask moves with it.
Mattes, on the other hand, are separate layers and will not move with the layer they’re applied to unless they are parented. This means that you can animate two layers separately to achieve interesting effects when using track mattes.
This short video helps us understand a bit more on this topic:
Masking tutorial:
Track matte tutorial:
This first link will get you to the materials for the tutorials, please download in order to follow along.

Watercolor Cabin Ink Mattes tutorial from Vinhson Nguyen: